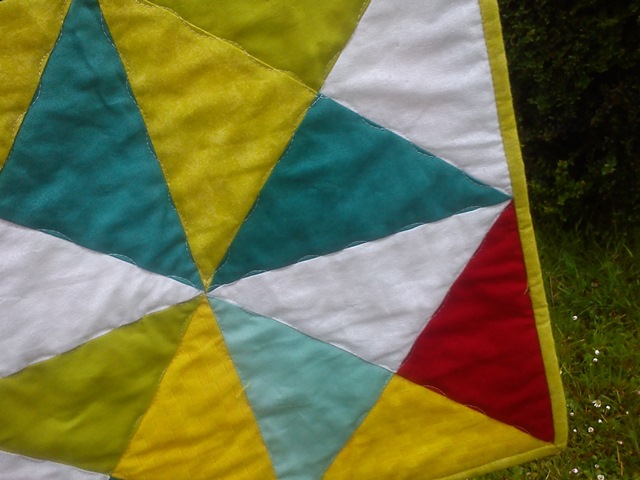
I do not know many people having babies, and so I haven't made a baby quilt as a gift for a while. So when I heard of baby Helena arriving, I decided it was high time I made another baby quilt. After all, what is better when you are a quilt maker, than making quilts?!
Not knowing the parents well - hardly at all, really - I decided to make a baby quilt I would be happy with myself, rather than trying to second guess the taste of the new parents. And since I like the quilt to be enjoyed beyond the early baby stage, I felt a cheerful, bright quilt was best. Which is great, since I have quite some fabrics lying around that would be suitable for that.
I started off with this fabric:
... and went to find coordinating solids (and a grunge) to go with it. Not finding any solid white, I also added a white-on-white print to the mix.
Then I changed my mind, and decided that it was better to use the flower print for the back, and use the solids (and almost solids) to make quarter square triangle (QST) blocks.
I started with 8 1/2" squares (my main ruler is 8 1/2" wide), and trimmed the QSTs to 7 1/2" after piecing.
I went with a square setting, 6 x 6 blocks, and spent ages rearranging the blocks to balance the colours (am I the only one?) until I gave up and concluded it was good enough. I also added an appliqué initial block in the mix to personalise the quilt. It made the quilt approximately 42" square.
For the quilting I abandoned my initial plan of straight stitching, and went with a long wave stitch instead, following the seams. This resulted in a less severe effect, and the odd wobble that wasn't due to the stitch itself did not show up as much.
I went for the same stitch along all seams, softening the strong graphic effect of the piecing to a small extent, and added echo quilting to the appliquéd initial.
Then came the next issue: The backing was a fraction too narrow! Rather than trimming the corners off the QSTs on the front, I decided to solve it by widening the binding. Usually I cut my binding at 2 1/4" wide, but this time I cut it at 4".
I sewed the binding to the front with a 1/4" seam allowance, and folded it to the back as much as it would go.
And then hand stitching it down onto the back in the usual way. This covered all edges neatly and securely.
To finish it off, I top stitched in the seam of the binding at the front, too.
And so, a few weeks after Helena arrived, she and her parents were gifted this quilt:
 |
| personalised with her initial |
 |
| and the back |
I may have to do this again, it was such a joy to make! And I hope it will give Helena as much joy, too!
Sandra


