- this post is part of the 2017 Finishalong Quarter 1 Tutorials Week -
A full list of my tutorials can be found on the
Tutorials page.
Most of our quilts get finished with "ordinary" continuous double fold binding (also called French binding), but there are several other ways to finish the edges of a quilt. In this tutorial I show you how I do a FACED BINDING. A faced binding neatly and securely finishes off straight quilt edges, but does not show on the front of the quilt at all. It is often used for art quilts, but it can be used for
any quilt where the binding may distract from the front, or when you want your colours or shapes to continue right to the edge of your quilt. If you need your quilt to be a particular (accurate) size, take note that the faced binding may reduce your quilt size a small bit. Depending on the thickness of the quilt sandwich this could be 1/4" or more.
For this method, we are using double folded binding strips as a facing (where I mention binding, I mean the binding strips that we are using here to face the quilt). I am using this method to finish one of my quilts for this quarter's Finishalong anyway (my only finish, it looks like). The complete quilt will be linked up shortly.
I have also used this method for another quilt, have a look at my wall hanging
HERE if you like.
So let's start!
Your quilt needs to be all quilted and any threads tied off. At this stage DO NOT trim the wadding and backing (yet)!
If you have it, use a walking foot, or engage the top feed of your machine. It will help you stitch through the quilt layers smoothly without distorting. Also make your stitches slightly longer when stitching through the layers, this will help prevent puckering and distortion of the edges.
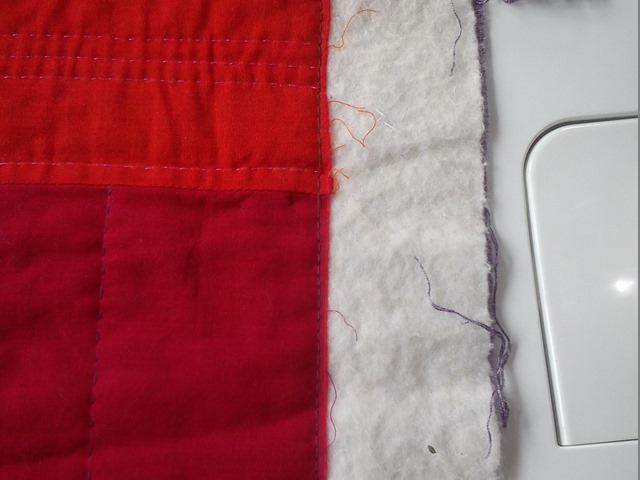
To secure the layers of the quilt, stitch down the edge of the quilt through all layers, just about 1/8 inch from the edge of the quilt top or so:
We will need FOUR separate strips of binding (= facing) 2" wide of the following lengths:
Two strips - the LENGTH of the quilt top PLUS 0.5" - these are your SIDE strips.
Two strips - the WIDTH of the quilt top PLUS 2.5" - these are your TOP/BOTTOM strips.
If needed, join strips with a diagonal seam (iron seams open) to make up to the
correct lengths, just as you would do with the usual
continuous binding. I needed to join a small length to each of my
strips, so I cut five strips, joined them all in one long strip, and
cut four strips to the required lengths from it.
Fold and press the strips double lengthways, wrong sides together, as you would for any double fold binding, to make a crease along the middle.
The main issue for faced binding is too much bulk in the corners, so we cut the ends of each strip at a 45 degree angle:
Open your strip flat, and align the 45 degree line on your ruler with one long edge of your strip.
Trim the corner, making sure to keep the correct length of the strip intact.
Trim the two ends of one strip angled in OPPOSITE directions!!
Fold the strip double again.
Position a SIDE strip along the SIDE edge of the quilt top, raw edges together. The beginning and end of the binding strip should extend about 1/4" beyond each corner of the quilt top. Make sure that the strip is positioned so that you will see a small triangle of the WRONG side of the fabric at the trimmed corner of the strip.
Stitch the strip onto the quilt sandwich with a 1/4" seam. You are stitching through all layers (use your walking foot if you have it). To guide a 1/4" seam from the edge of the fabric you may want to move your needle over so it sits 1/4" away from the edge of the foot.
Repeat for the other side edge with the second SIDE binding strip.
Trim the sides of the quilt at 1/2" from the stitching line (this should be approx 1/4" from the edge of the quilt top). Do NOT trim the TOP/BOTTOM yet!
Trim the wadding at the corners to reduce bulk.
Press the binding strip towards the edge of the quilt. If you have used polyester wadding, be careful when ironing, the polyester may melt! In that case, you may be better of just finger pressing the strip outwards.
Stitch the binding strip down onto the seam allowance, about 1/8" from the seam. This is called understitching, and helps prevent the facing to roll towards the front of the quilt when we're done. Make sure to push the binding strip firmly outwards when understitching.
This is how that will look:
Now start on the top and bottom of the quilt, using the TOP/BOTTOM strips. These strips have been cut a bit longer, since they have to stick out by about 1 1/4" at each corner. Position the strip with the raw edges level at the edge of the quilt top.
Mark at the corner where the seams of the SIDE strips are (about 1 1/2" from the point of the TOP/BOTTOM strip). You don't want to sew down the very corner of these strips, sew only between the SIDE strips.
Starting at the mark, stitch this strip down with a 1/4" seam allowance as before.
Repeat for the second TOP/BOTTOM strip. All four corners will now look like this:
Trim the edges of the top and bottom of the quilt at 1/2" from the TOP/BOTTOM strip stitching (again, approx. 1/4" from the edge of the fabric).
Like you did for the SIDE strips, again press the binding strip outwards firmly, and understitch the strip to the seam allowance. Your corners will look like this:
Trim the corner of the backing fabric away at the very corner, so it doesn't stick out beyond the corner of the quilt top.
Now turn your quilt over so the back is facing you. Turn a SIDE binding strip towards the back. Because it is understitched, the whole quilt sandwich will roll with it. Pull the binding over so far that the whole binding strip lies onto the back of the quilt. The front of the quilt will show a little when looking at it from the side, but should not be visible when looking straight at the back.
Repeat for the other SIDE strip. The corners of the TOP/BOTTOM strips will be sticking out quite far:
Fold the corner of the TOP/BOTTOM strip to the back, slightly angled towards the raw edges of the SIDE strip. Pull the corner firmly around:
Roll the TOP/BOTTOM binding strip to the back. The points of the strip will be tucked inside, and the raw edges will all be covered. Repeat for the second TOP/BOTTOM strip:
Check that your corners look neat and square from the front:
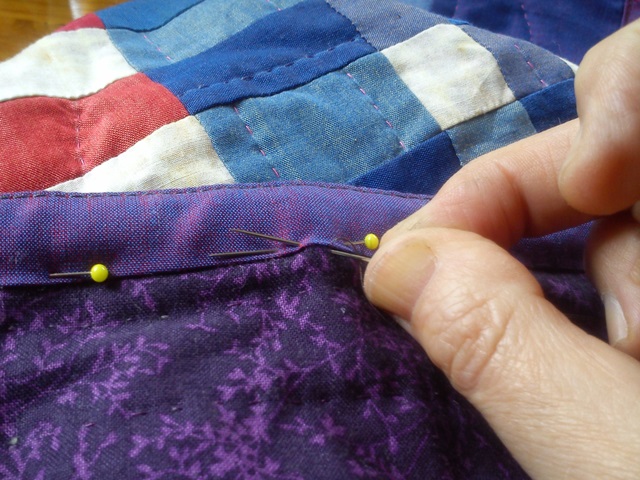
If you are happy, slip stitch the binding strips in place at the back, making sure your stitches do not go through all layers, so they are not visible from the front.
This tutorial is part of the 2017 Finishalong Quarter 1 Tutorial Week.
Here is the complete schedule so you can visit them all:
If you are looking for the link-up for your Quarter 1 finishes, you can find that
HERE or at any of the other hosts. The link-up will be open until 4 AM (BST) on 2 April. If you want to know exactly when the linky closes in your time zone -
I may again be one of those last-minute linker-uppers myself - check at the bottom of the link-up. It says how much time you have got left before the linky closes!
I better get to it and finish my quilt ready for some blog-worthy photos!
Sandra


