In the last few days I posted some pictures on Instagram which got unexpected comments. Apparently the method I was using for attaching my binding is not as common as I thought. Which made me realise that there are probably quite a few tips and tricks that I may have picked up in the twenty-odd years I have been making quilts. Starting with the way I attach "ordinary" continuous binding, here we go...
Sewing on binding
I used to trim my (quilted) quilt straight and square, and then attach the binding, raw edges together, to the edge of the trimmed quilt.
NO MORE!
While the use of a walking foot helped to some extent, the right feed dogs were never quite gripping the fabric since it was trimmed, and I was struggling to keep the quilt going straight. And the edges of the quilt still tended to stretch, resulting in wavy edges. Not my preferred look.
So these days I sew my binding onto the quilt before trimming. The raw edges of the binding are stitched level with the edge of the quilt top and sewn on as usual through all the quilt layers. Then I trim the quilt edges.
And then... I trim the quilt level with the quilt top, yes?
Well, NO!
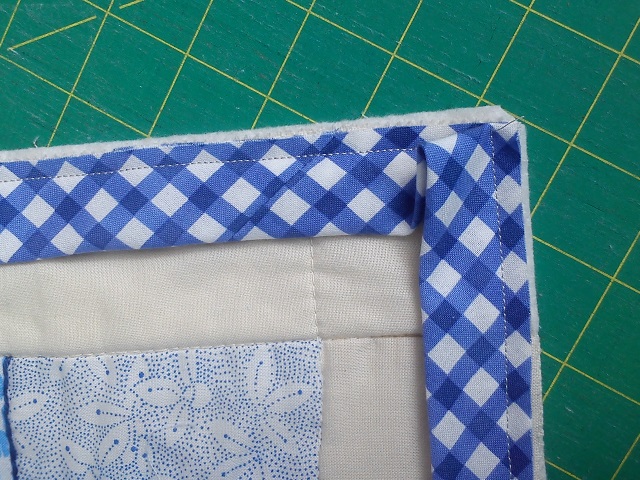
It depends a bit on the look I am after, how wide I cut my binding, but I always aim to trim the edges of the quilt so that I end up with a well filled binding while stitching the binding to the back at the stitching line. In this case, my binding was cut at 2 1/4" wide (my usual size) and folded double. It was stitched a good 1/4" away from the edge of the quilt top.
For ease of turning the corners, I trimmed away the very corners of the wadding. The corners are usually bulky enough.
And there you have it, perfect binding! Don't you love the effect the check gives?!
But hold on, what if your quilt is not quite as straight as you would have liked? Shouldn't you trim the quilt first to straighten it?
Some may prefer to do that, but I don't. When the edge needs adjusting (this happens often enough - how do I know...), I draw a line where I would previously have cut the quilt, and then line up the raw edges of my binding with that line. Afterwards I cut the quilt edges straight, parallel to the stitching line.
Sandra


Good tip! I hate sewing on bindings and I will follow your instructions on my next quilt!
ReplyDeleteThis is so unique and positively brilliant Sandra! I'm definitely going to give your binding method a try the next time I sew one!
ReplyDeleteI haven't seen it done like this before, but this is a pretty cool idea. I particularly like that you decide how much wadding you cut away right at the end.
ReplyDelete